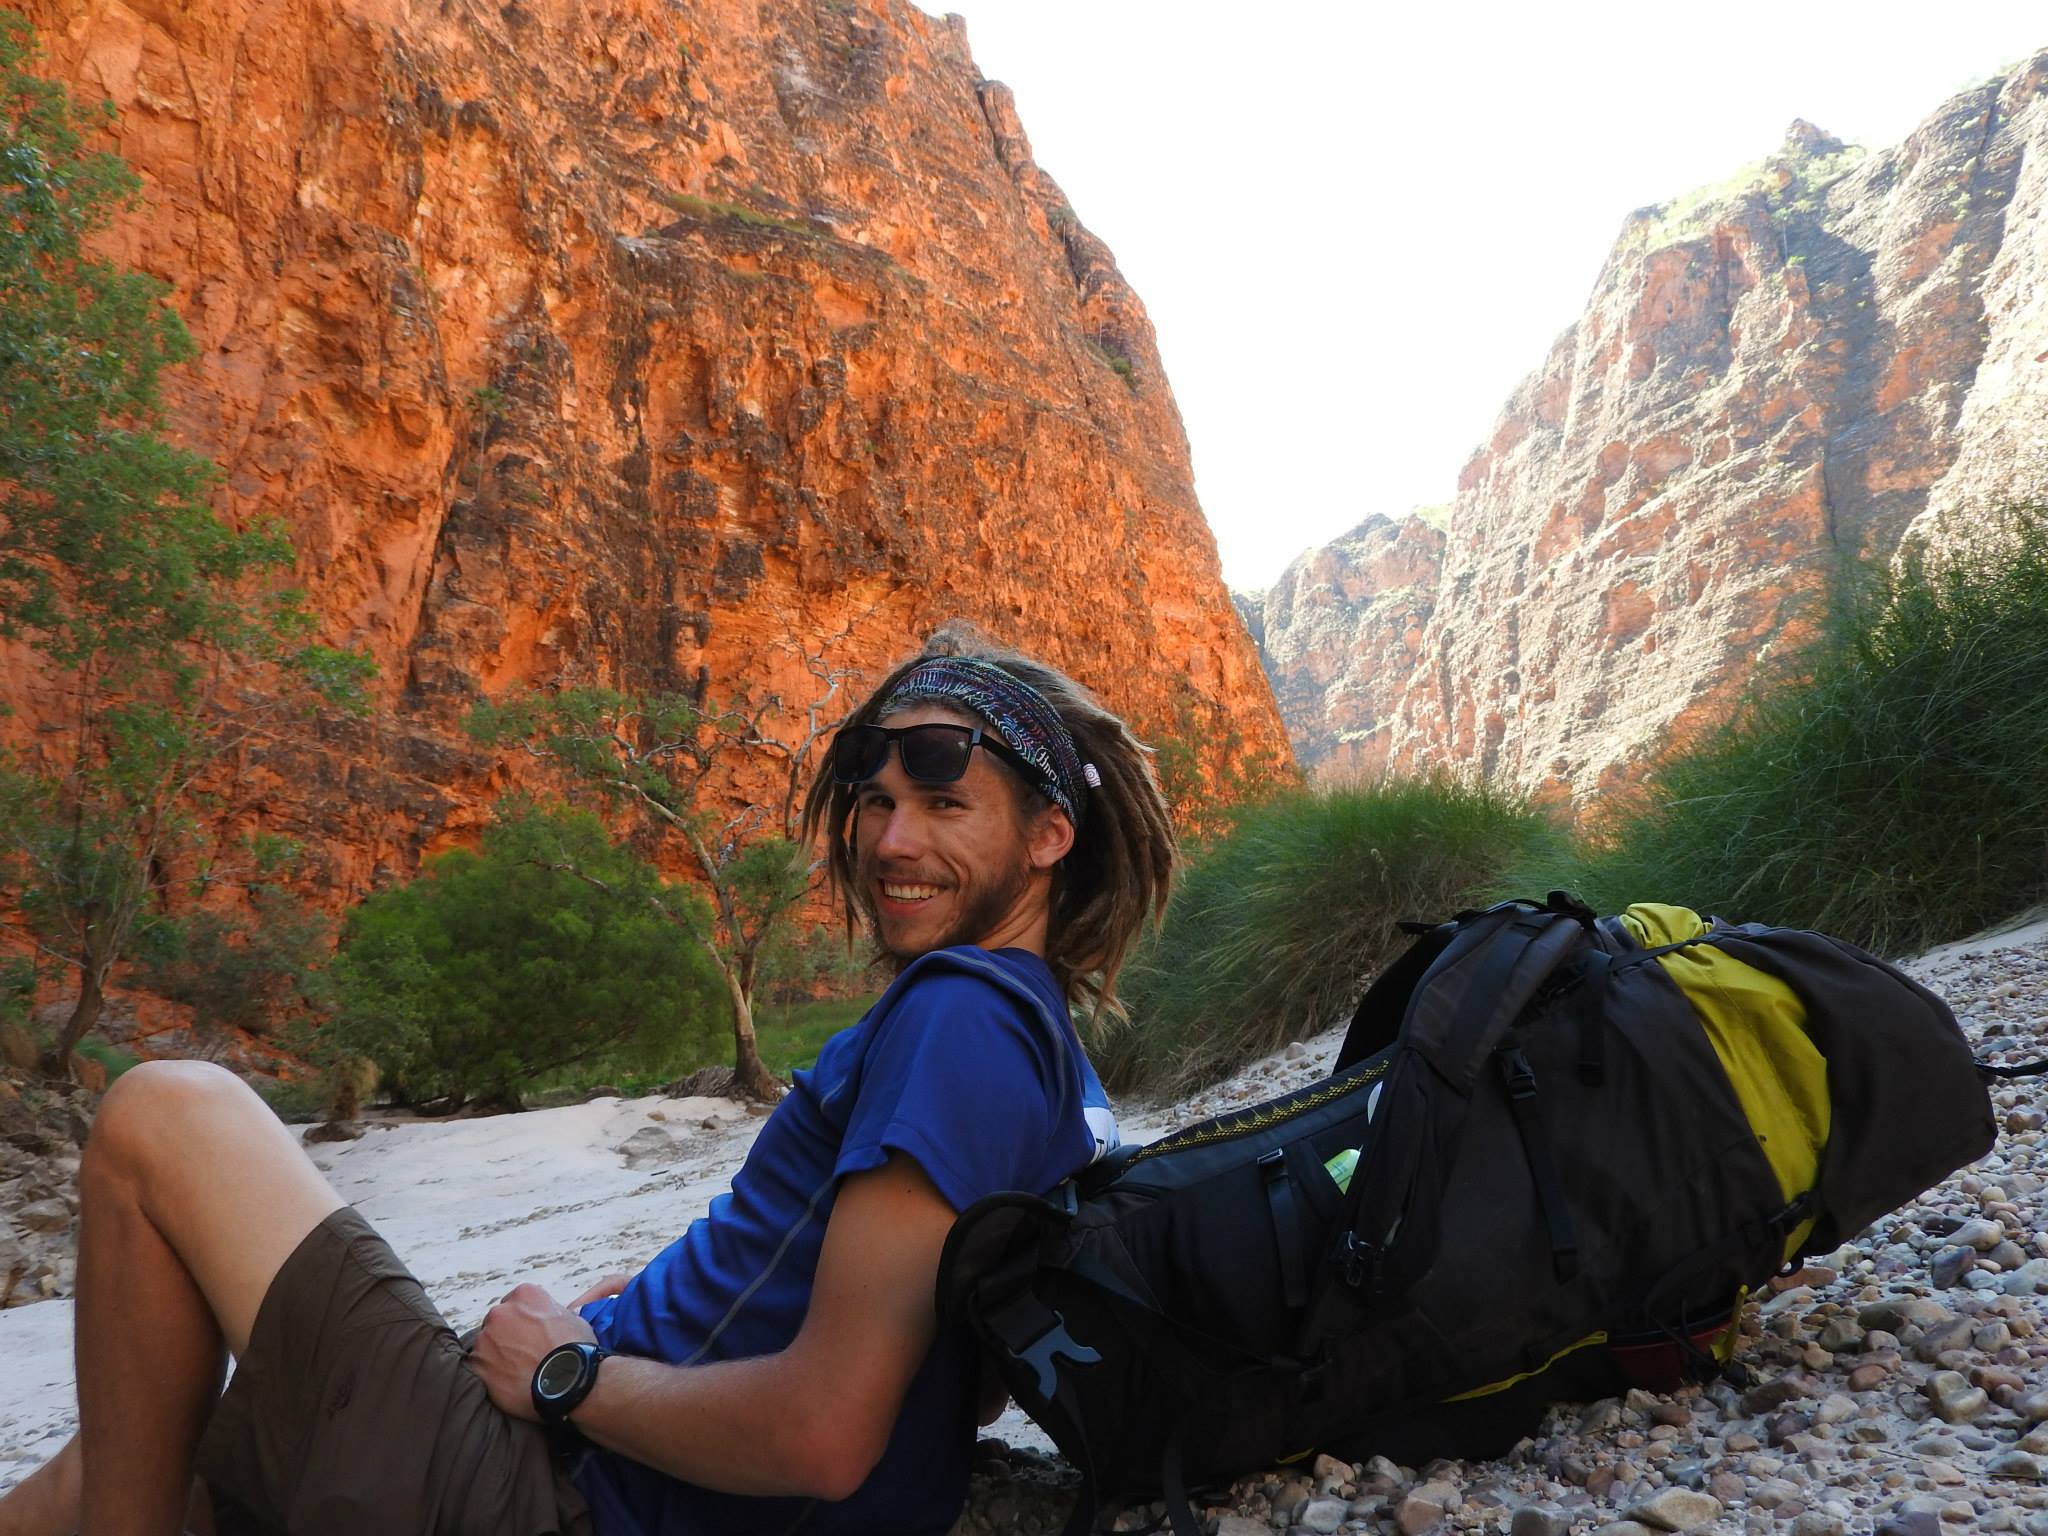
Here’s what I took on a 3 day hike into Frenchman’s Cap


We often hear from our customers that planning the logistics of their Overland Track hike is the most complicated aspect of their trip. So, we’ve decided to try and make things a little easier for you by giving you some helpful hints!
First up, before you even get to Cradle Mountain there are a few things you should be aware of
1/
· You need to have booked your Overland Track Pass already if you’re planning to hike between the 1st of October and 31st of May.
· There are 34 permits available each day
· Permits become available at 9am on the 1st of July for the following summer season, get in early as they sell out fast! You can book your permits here https://parks.tas.gov.au/explore-our-parks/cradle-mountain/overland-track
· You will also need a separate National Parks Pass which you can pre-purchase online here https://passes.parks.tas.gov.au/ or you can organise this when you arrive at the Visitors Information Centre
2/
· If you plan to take the ferry from Narcissus to Cynthia Bay at the end of your hike it’s a really good idea to have booked this with as much notice as possible – the popular times will book out well in advance.
· There are 3 time options for your pick up from Narcissus – 0930, 1300 & 1530
· You can book your ferry here https://www.lakestclairlodge.com.au/lake-st-clair-ferry-service/
3/
· Hire an ePirb - you can do this through our online Hiking Gear Hire page . Alternatively you can hire these at the Visitors Information Centre at Cradle Mountain, but they can sell out and you can’t pre-book!
4/
· Book some transport! That’s where we come in! We have a range of different options to get you to/from the trail…. But there is some information that you should be aware of before you decide what to do…. Read on!
· Upon your arrival at Cradle Mountain you will collect your permit and parks pass (unless you have purchased one in advance) from the rangers at the Visitors Information Centre.
· Once you’re all signed in the rangers will conduct a safety briefing to ensure you have the right equipment, understand the conditions, what you’re about to embark upon and answer any questions that you may have.
· These briefings are compulsory and the first one is at 0830 – with others occurring hourly after that. We recommend arriving half an hour before the briefing time to ensure you make it – otherwise you may have to sit around and wait a while for the next one!
· The safety briefings will take roughly half an hour and, once finished, you can hop on the shuttle bus and head out to Ronny Creek to begin your hike!
· All up, from arrival at Cradle to stepping out of the shuttle bus at Ronny Creek you should allow an hour (more if you want to grab a coffee at the café!)
· You can check in the day before you start hiking but only from 1500 onwards with the last briefing at 1630 – if you choose to do this then the following morning you can just wander down to the shuttle bus and head straight into the National Park to start hiking!

OK…. now that you know all of those details, it’s time to decide on some transport, and there are a few options for you:
- Launceston to Cradle Mountain: the most popular option, will take roughly 2hours
- Hobart to Cradle Mountain: not as common as above as this option takes twice as long, if this is your choice we’d advise arriving at Cradle the day before your hike starts to avoid a long drive and a late start on the trail.
- Lake St Clair to Cradle Mountain: for those who have further travel plans after they finish hiking and have access to their own vehicle a popular option is to park your car at Lake St Clair and be transported back to Cradle Mountain to start hiking. As with the Hobart to Cradle option, this is a longer drive (3.5hours) and we’d recommend doing this the day before your hike is due to start.
- You may also choose to park at Cradle, hike the trail, be picked up at Lake St Clair and driven back to your car at Cradle.
- Lake St Clair to Launceston: your pick up from Lake St Clair will depend on the ferry you have booked, or the time you plan to arrive at the Lake St Clair Visitors Centre. It’s a 2.5hour drive back to Launceston.
- Lake St Clair to Hobart: exactly the same info as above!
Bookings for transport can be made here: https://wildislandadventure.com/transfers and as always, if you have any questions or need further advise please get in touch https://wildislandadventure.com/contact

Phytophthora, pronounced ‘fy-toff-thora’, is an introduced pathogenic water mould also commonly known as ‘root-rot’ in Tasmania. It is one of the worst invasive plant pathogens in the World and in Australia is known as a Key Threatening Process that can severely degrade vegetation communities and kill susceptible plants.
It is thought the phytophthora was introduced to Tasmania with European settlement and is now very well established in areas of moorland, heathland and dry sclerophyll forests,

Phytophthora needs warm moist soil conditions to thrive. This results in its distribution around Tasmania being limited to below 700m and prevents it from infesting low rainfall areas such as the Tasmanian midlands. Dense forest canopies that shade the ground keep soil conditions cooler, which prevent the mould from affecting wet forest and rainforest communities. Heathland moorland and dry sclerophyll forests are highly affected – areas around the coastline of Tasmania. Phytophthora feeds on the root and basal stem tissue of living plants, which will eventually weaken and kill the host plant.
In Tasmania there are 181 plant species that have been recorded so far as being hosts for phytophthora. The effect of the mould can be dramatically different from plant to plant. For example button grass, while being a host for the mould, appears to be resistant showing no signs of the disease while the white waratah is killed so rapidly and may not be able to regenerate in infected areas. The drastically different responses by the host plants means that, in some instances an area where phytophthora is abundant may look to be completely unaffected. A monoculture can also occur where a resistant plant, such as the button grass, is still able to grow and survive while other more susceptible plants die off.

Buttongrass Moorland
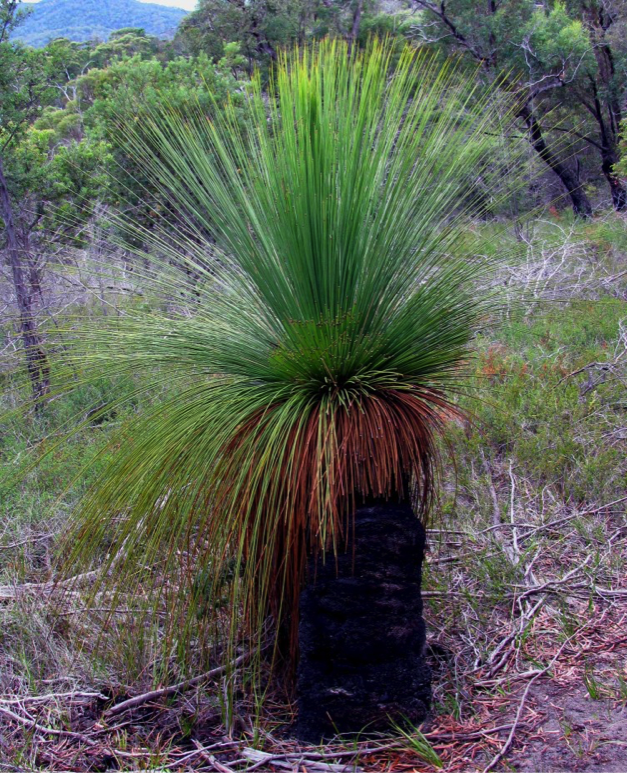
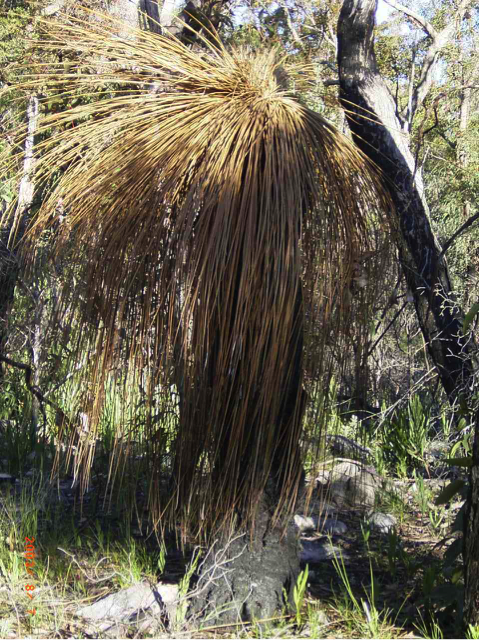
One of the most easily identified and observed plants that are affected by phytophthora are the grass trees. It is unlikely for grass trees to survive in an affected area, which can completely change the vegetation structure. Once infected, grass trees will collapse dramatically. Areas such as Mount William NP and Douglas Apsley NP are examples of places where grass trees have died in massive numbers.
Phytophthora is transported through mud and dirt that can be carried on boots, gaiters, hiking poles, tent pegs, cars etc. For this reason it is so important that when travelling from place to place all dirt and mud is thoroughly cleaned off any bushwalking equipment and vehicles – paying particular attention to the wheel arches and tyres of a car. Disinfectants such as F10Sc or methylated spirits can also be used as a surface sterilant after washing

Piccaninny Creek - the start of the journey

Making our way up Piccaninny Gorge

Rainbow Bee-eater

The Bungle Bungle Ranges

Exploring Finger # 1

Cathedral Gorge - Purnululu National Park
Nothing could have prepared me for the incredible beauty, uniqueness and wonder of the Bungle Bungles; it is an absolute mind blower!
The trek takes you down the fairly dry Piccaninny creek where 250 million years of intense weathering and erosion has carved out amazing formations in the sandstone bedrock and left behind the classic ‘beehive’ formations – showcasing the earliest evidence of life on earth (cyanobacteria). After 7kms of creek walking the trail takes a sharp turn and takes you into the gorge, where all the fun begins! Expect big rocky boulders to scramble over, long pools to swim through, awesome bird spotting, monitor lizards, a few snakes and, unfortunately, the dreaded cane toad!
So, how do you get in!? There are a couple of options for getting into Purnululu National Park, and it depends where you’re coming from. If you are on a bit of a road trip journey around Australia then you can drive right in to the trailhead. From Kununarra, where I suggest you stock up on supplies, it’s a 4.5hour drive. Once you leave the Great Northern Highway the road into the camping grounds is an unsealed 4WD track, you will need to have a suitable car. The other option is to take a scenic flight from Kununarra into Belbourn, the airstrip near the trailhead. From here get a lift to the Cathedral Gorge carpark with EKT Tours who can supply water and fuel for you – make sure you organize this well in advance as you can’t take either on the flight.
However you get there, whether it be by scenic flight or driving in from Kununarra; make sure you get an early start. Piccaninny creek is quite open and doesn’t offer a great deal of shade. There are water holes that have been left behind from the previous wet season to cool down in but I do suggest getting an early start to avoid the intense heat that can occur – early mornings are the key here.
From the car park you initially follow the Domes Trail for 600m until you hit Piccaninny Creek. There may be a few day walkers out and about as there are many side trips along the first few kms of the walk – I recommend skipping all of these and saving them for your last day so you can make the most of the cool morning and make it into the gorge before the heat of the day really peaks.
Once you’re following the creek you’re on the right track! Keep following the creek bed for 7kms– you really can’t go wrong! Towards the end of the 7kms the creek bed will start to zig zag quite a bit…. And then, the last zig won’t zag - this is known as the ‘Elbow’ and is the entrance to Piccaninny Gorge. Head up the gorge for roughly 1km and on the right-hand side you will see in the distance the remnants of a big waterfall, and right on the track a large pothole that may have some water in it. This is Black Waterfall, a possible campsite for your first night, and a definite stop, swim and cool down spot. The walk in to the waterhole is very rocky; take care walking along here and within 10 minutes you will have reached a massive waterhole that is mostly in shade, fringed with tall Livistonia Palms. I have camped in the creek bed at the turn off for Black Waterfall a few times and it is a really great place to spend the afternoon if time is getting away from you or if you are struggling with the heat.
Roughly 3kms up the gorge splits in two, this is the beginning of the ‘fingers’ (mini gorges) with finger 1 on the left and finger 2, 3, 4 & 5 further on up the right. Just before the split on the left hand side is an awesome campsite to base yourself for a few days. This is a popular campsite and you need to be prepared that it will be taken. I have found if you wander up finger 1 a short distance, there is a nice place to camp in there as well.
From the base camp, the fingers are all accessible for exploration. The thing I love the most about the Bungle Bungles and exploring the gorges is that there is no trail, no set beginning or end… you can just explore the gorges at your own leisure. The day’s adventures will contain plenty of rock scrambling, swimming and each ‘finger’ is unique to the other. Finger 1 mainly involves swimming through a narrow and dark gorge: take a head torch and wear a woollen top to keep warm in there, it does actually get cold believe it or not! I usually pair finger 1 with finger 5. Finger 2, 3 & 4 can be done in a full day… I would suggest dedicating most of the time to finger 2 as it is AWESOME! There are some amazing rock formations in there, lots of bouldering, scrambling around waterholes and wading through pools… so much fun! Finger 3 is quite challenging so if you have the time I would recommend moving base camp up to near finger 3 so you can explore in there a bit more. Finger 4 is a lovely little cave, with some great little hidey-holes.
It’s a good idea for the last night to head back out of the gorge and along Piccaninny Creek so that you’re closer to the end… this way you can spend the morning checking out all the side trips that are near the entrance before heading back to civilisation!

GTX is an extremely thin membrane layer of expanded polytetrafluoroethylene (ePTFE) more commonly known as Teflon! The membrane has over 9 billion pores per square inch…. Giving Gore-Tex it’s waterproof, windproof and breathable characteristics.

For use in products like jackets and pants, GTX is bonded between a high performance lining and an outer fabric that has been treated with a durable water repellency (DWR). The DWR prevents the main outer layer of the product from becoming wet – causing the water to ‘bead’ off the outer layer.
It is a common misconception that, once the DWR wears off, the jacket is no longer waterproof. DWR is the jackets first defense, it wears off fairly quickly but the waterproof membrane is the main barrier. Although water may not bead off the jacket anymore you will still be kept dry and protected by the inner membrane.
Being a waterproof barrier is not the only thing GTX is good for. Due to the porosity of GTX the body’s own tissue is able to grow through the material making it extremely useful in medical applications such as sutures, vascular grafts, heart patches, synthetic knee ligaments and as membrane implants for glaucoma surgery.
eVent is also made of ePTFE like GTX but the pores of the membrane are lined with an oleophobic and hydrophobic (oil and water hating) chemical. This allows the membrane to remain air permeable. For this reason, eVent has been tested to be almost 200% more breathable than Gore-Tex. The down side is that the membrane isn’t as protected and durable as GTX and requires much more TLC to maintain it’s high performance.

eVent is used a lot in waterproof compression bags; because of its amazing breathability air is able to be pushed out through the fabric making the bag as small and compact as possible while still being waterproof. These are fantastic for sleeping bags when out on a multi day hike, rafting, kayaking, really whatever pursuit you’re doing they are great!

Hydronaute is a house made membrane created by Mont. Well known for its durability and breathability. The membrane is laminated to a face fabric using innovative technology to create superior weatherproof-ness and comfort. The face fabrics that Mont use are crucial to the performance of their garments. Mont has access to some of the most advanced face fabrics on the market that provide increased abrasion resistance, tear strength and pinhole resistance. Mont Hydronaute products are durable, bombproof wet weather garments made specifically for the Australian bush.

Waterproof membranes aside, it also comes down to the style of jacket. There are GTX cycling jackets – super thin and lightweight, not suitable for bushwalking. There are 3-layered knee length super hardy Mont jackets – not suitable for backpacking and travelling minimal. When it comes to choosing the right jacket have a good think about what it is you’re going to be using it for and find the jacket that suits the activity. You may end up with 2 or 3 different styles or decide that, instead of buying brand new for a once off trip, hiring as suitable jacket would be a better idea.
Exposure to sweat, dirt and chemicals in sunscreen & deodorant can have a negative impact on your waterproof garment. So, to keep it performing at its best, it’s important you clean and care for it properly.
I wouldn’t recommend washing your jacket after every single use; there is damage that can be done in over-washing. Personally, I would wash mine after a multi day hike but only if I actually wore it in some pretty full on weather conditions. Maybe you just need to hang it up in the sun to air out for a little bit instead of doing a full wash.

Before washing your jacket, pants or whatever it is you’re washing, check the care instructions on the label, empty the pockets off any rubbish, lip balm, lighters… all those things that you can never find that end up in the pockets of your rain jacket :-)
Always use a specific GTX/waterproof approved liquid wash. Something like Grangers or Nikwax. Read the bottle for instructions on how much to use – usually it’s 2 capfuls for the first item and then 1 per item after that. Wash your garments on a gentle cycle with no hot water.

Once done, hang on the line to air dry until just damp and then put it in the dryer on a low heat setting to finish off. The heat from the dryer will help to restore and prolong the DWR coating on your jacket.


The Freycinet Peninsular on Tasmania’s east coast is one of the oldest and most visited National Parks in Tasmania – Celebrating its 100th birthday in 2016.
Wineglass Bay is the obvious main attraction and the majority of people chose to take the path up to the Wineglass Bay Lookout. If you’re like me, and try to do whatever possible to avoid the crowds, then the Freycinet Peninsular has got some truly spectacular spots to visit – all it needs a bit more effort.
The Freycinet Peninsular circuit will take you around the edge of the Hazards Mountain Ranges – an amazing range of pink granite. Pink granite is unique to the eastern coastline of Southern Victoria, the Bass straight and the east coast of Tasmania all the way down to the Tasman Peninsula. The cause of the beautiful pink tinge in the granite is iron oxidisation impurities in the feldspar (one of the components that make up granite) and a lovely orange lichen that grows on many of these rocks.
Following the trail from the carpark, look out for the turn off for the Hazards Circuit. The track starts off in the forest and begins to steadily climb its way up before emerging into the open, rewarding you with amazing views of the Great Oyster Bay.
The trail follows the edge of the Hazards for a little while before descending down onto the northern tip of Hazard’s beach. For the next 2.5kms the track simply follows the beach south. Stick to the hard, wet sand and keep an eye out for ancient Aboriginal middens in the sand dunes to your left. Pacific gulls, pied oyster catchers, hooded plovers and many other sea going birds call this beach home.
The southern end of Hazards beach has a campsite with a toilet, making it a great spot to have some lunch and a swim! From here it’s back into the forest for another 3.5kms. Look out for superb fairy wrens, flame tailed robins and green rosellas as you enjoy the peaceful dry sclerophyll forest that is often full of such gorgeous intricate wildflowers.
You will eventually emerge onto the northern tip of Cook’s beach which is only a short distance from camp! Cook’s beach camp is stunning and very well equipped with composting toilets and a rain water tank. Depending on the time and how you are feeling, a 4km walk past the old hut will take you to Brian’s bay – an absolutely stunning and isolated beach. You may want to take a whole day to head out to Brian’s and explore the beach!
From Cook’s beach camp the trail heads back to the northern tip, before heading towards Mt Freycinet & Mt Graham. There is a bit of an uphill slog for a while now but eventually you will get to the saddle between Mt Freycinet and Mt Graham..... drop your bag here and go for a wander up Mt Freycinet. The view of Wineglass bay, Schouten Island, Maria Island, the whole Peninsular is absolutely astounding and so worth the extra walk.
Unfortunately there is no easy option for Mt Graham... you have to go over it, and with your pack too. A steep rocky climb will get you to the top and then follow the trail along a beautiful plateau filled with buttongrass before beginning your decent down to Wineglass bay.
There are a couple of small, very unreliable streams you could collect water from on the way down but I would suggest carrying extra from Cook’s beach to get you through the night and the next morning.
The next day you get to walk all the way along the beautiful world renowned Wineglass Bay, from the southern end all the way up to the northern end. Keep an eye out for dolphins and whales who love to use this bay as a rest stop on their migrations north.
From the northern edge of Wineglass bay the trail begins to climb up to the lookout – if you get up early enough you may have the lookout all to yourself before the bus loads of tourists arrive! Follow the trail down the other side of the lookout and back to the carpark.
If it’s a nice day I would highly recommend taking the climb up Mount Amos – from the top you will be able to see where you have walked for the past couple of days and get those award winning photos of Wineglass Bay!

.

.

Okay, so you have the usual suspects – a good hiking pack, some comfy boots, a warm sleeping bag, a sleeping mat, a head torch etc….. You can’t leave home without these items full stop. But sometimes, it’s nice to have a little bit of ‘luxury’ when you go hiking, something that makes you really appreciate the little things in life. That’s one of the best things about going bushwalking – learning that you really can live simply out of what you can carry on your back!
I’ve been a keen bushwalker about 8 years now and, as you go along you learn what you need and what you really don’t need out there. There are the essential items, and then there’s a bunch of things that aren’t… but almost should be, if only to make you happier at the end of the day.
Here are some things I like to bring along to make my bushwalks just that little bit more enjoyable:
· - A good pillow! Nothing is more important than getting an amazing nights sleep after a big day on the trail. I have tried and tested so many different ‘pillow’ options in my time. From using a spare stuff sack and packing it with clothes, to super small blow up pillows. I now have what I consider the most amazing pillow ever! I have the Exped Mega Pillow, it weighs 170g, has a fleece liner and you just blow it up. It was a serious game changer in my hiking life. But hey, what’s right for one may not be right for another – but I do recommend, take the time to find the perfect pillow for you.
· - Some sort of lightweight chair..... the ability to get up off the ground and have some back support is so amazing, especially if it's wet and muddy. I am often copping curious looks from other hikers who don’t have a chair, yes it weighs about 700grams but for the sake of my back (and my bum not getting wet) it is so worth it! Have a look at Helinox for some good lightweight options
· - A book to read, to write, to draw, to colour etc. Don’t be that person who gets into camp, sets up, eats dinner and goes to bed as soon as its dark because there’s nothing better to do. Nowadays everyone hikes with their phones to take photos – download a book onto your phone, or find a nice lightweight one to carry with you. Even just having a notepad to write down a little journal of the day, or if you’re artistic draw a picture! If nothing else it could be a conversation starter with other people in the campsite.
· - I like to take something that I love to snack on.... lets face it, hiking food can be fairly un-inspiring, give yourself something to look forward to at the end of the day, when you get to the top of that hill or once you cross that river. Everyone needs a little bit of motivation sometimes. My favorites to take are macadamia nuts, passion fruit, dried mango and peach….. a hip flask of port..
· Last, but definitely not least… a thermos! I fill it up in the morning so I can enjoy a cuppa at lunch without having to dig out my stove!
You can have all the essentials to keep you warm, dry and safe out there…. But don’t forget, sometimes it’s nice to have something to keep your spirits up after a hard days slog!
-
Nothing feels better than that first day out on the trail; you’ve left the city behind and all that comes with it – the crowds, the lights, the noises, and the hustle and bustle. You are free to forget about work; the deadlines, the emails and the 9 to 5 routine. There’s no room for any of that in the bush, you are too distracted by the beauty of where you are and the need to keep putting one foot in front of the other. It is an amazing feeling to know that for the next few days you don’t need an alarm clock or a schedule – all you need to think about is getting from one campsite to the next. That is the beauty of a self-guided walk – it opens you up to live life completely on your own terms.
Something I love to do when I go bushwalking on my own is take my watch off and leave it behind. Why do I need a clock anyway? I can eat when I’m hungry, sleep when I’m tired and wake up to the sun. I take pleasure in the fact that I don’t need to set an alarm. I always try to position my tent so that I am facing the sunrise because there’s no better way to wake up.
A self-guided hike gives you freedom. Freedom to walk at your own pace, stop when you want or keep walking as long as you want. You can spend 15 minutes getting that perfect photo of a beautiful wild flower, or just sit, look and contemplate. There’ll be no one telling you it’s time to leave, or to hurry up because you are running late. No one telling you to stop and rest when you don’t need to.
Don’t worry though; you won’t be the only one out there doing it on your own. You will meet other people who are also enjoying the perks of a self-guided walk. While you may not walk with them during the day, they will all be waiting for everyone to arrive safely at camp – it becomes a lovely little community of people looking out for each other, sharing some tea, or some chocolate and lending a hand if something breaks. By the end of the week you will have formed friendships with other hikers – who knows, you may have found a new hiking buddy for future adventures!
There may be moments where you second guess yourself on the trail, where you think…. Maybe I can’t do this. You may wish you had bought that other pair of boots, or an extra layer of warmth…. Or that flask of port. By the end of the walk you will have had to motivate yourself and say to yourself… hang on, I can do this! Knowing that you have made it relying on no one other than yourself awards you with such a great sense of achievement you will be planning your next self-guided adventure on the way back home!